Here is a short guide for how to mod Robocop: Rogue City (RRC from here on) and other UE5+ games. This won’t be as detailed as my previous guide for UE4, so please read that first to understand everything.
Note that this tutorial is primarily meant for modifying Content, not Code, and this is based on a game without Encryption / sig files. If you see “.sig” file, then things are more complicated.
Required Software
- FModel: https://fmodel.app/
- Used to quickly sift through existing pak/ucas/utoc files.
- FModel Mapping file for the game.
- Robocop: Rogue City: Download Mappings
- More mappings can be found on the FModel Discord.
- Unreal Engine matching the game (For RRC that is 5.2 or 5.2.1): [get from Epic Games launcher]
- Same deal as UE4; you need the matching version to generate the files.
Other Software (not required)
- UE4SS: https://github.com/UE4SS-RE/RE-UE4SS
- Enables modding beyond just content (e.g. scripting/programming).
- I was able to get UE4SS working by using the Experimental branch. Check out their Discord to learn more.
- Can be quite complicated. This guide won’t go into it.
Tutorial
- Open FModel and add RRC.
- Navigate to the Game Selector (Directory > Selector), and add a new game, pointing to the game dir for RRC
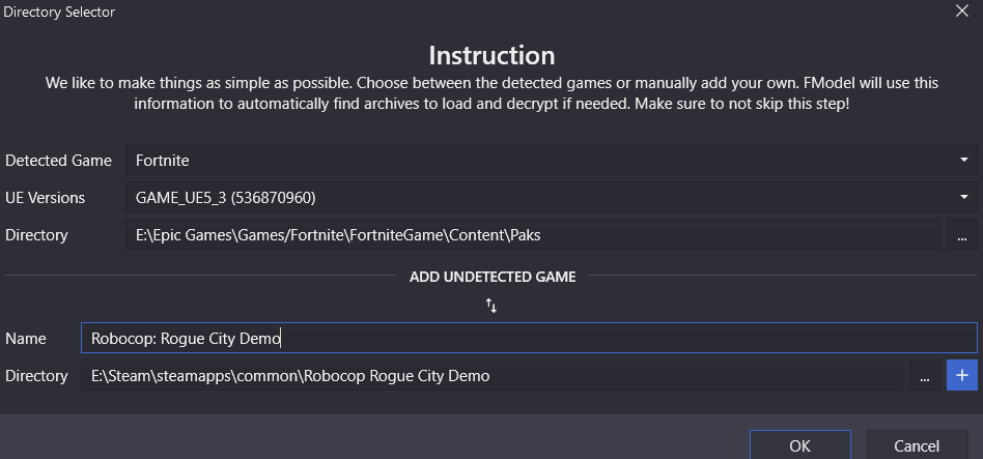
- Press the “+” button with it filled out, and hit ok.
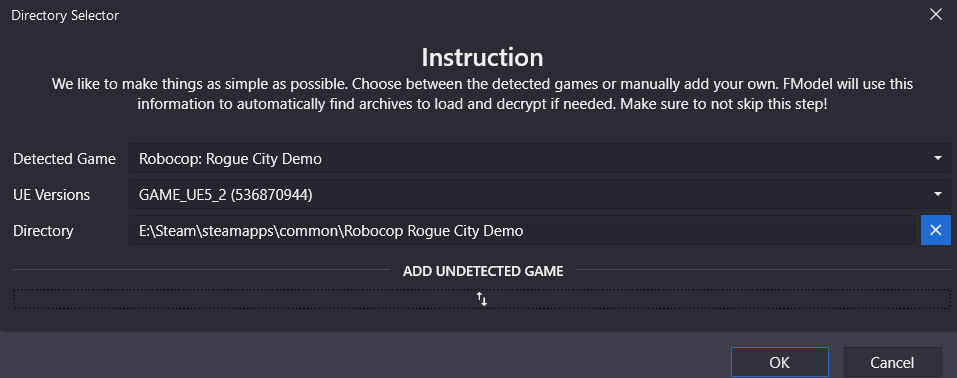
- Once it reloads, go back to the same screen, find RRC from the Detected Game drop-down, and change UE Version to 5.2. Press ok.
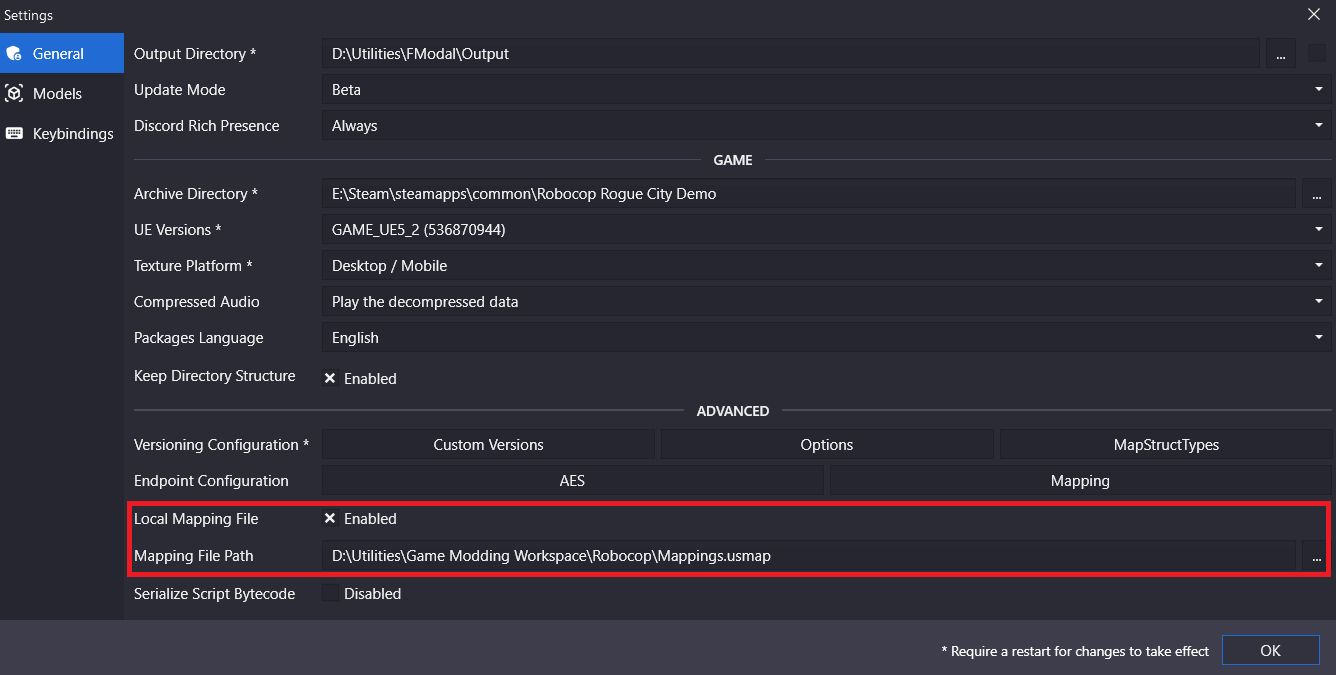
- Once it reloads (again), apply the supplied Mapping file. This will correct loading errors. Navigate to Settings, and in the new screen that appears tick the “Local Mapping File” checkbox, and point it to the mapping. Press OK.
- You can now freely explore the pak/ucas/utoc files and export any content to modify.
- Launch the game’s matching Unreal Engine version (RRC: UE 5.2 / 5.2.1).
- Create a new game project matching the base directory for your title. For RRC, that is “Game” (so game.uproject). IF THIS DOES NOT MATCH, CONTENT WILL NOT BE LOADED!
- Drop your modified files into the content browser, and arrange them into the matching folder structure from FModel. Note that “<game name>\Content” should be dropped from the path, as it is already implied within the engine (the Content Browser starts in Content afterall!)
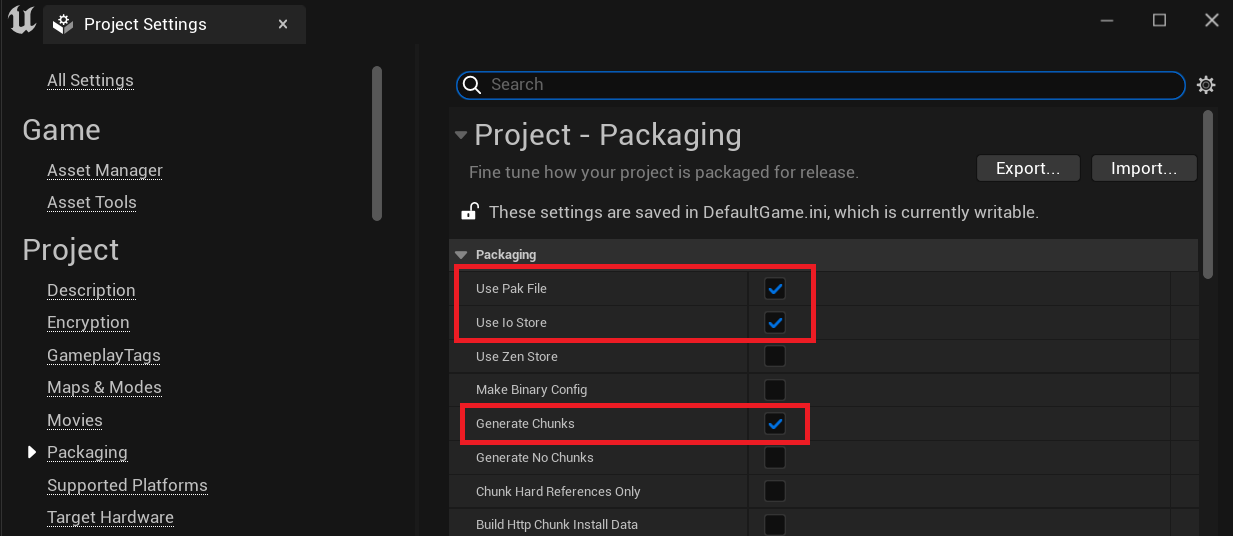
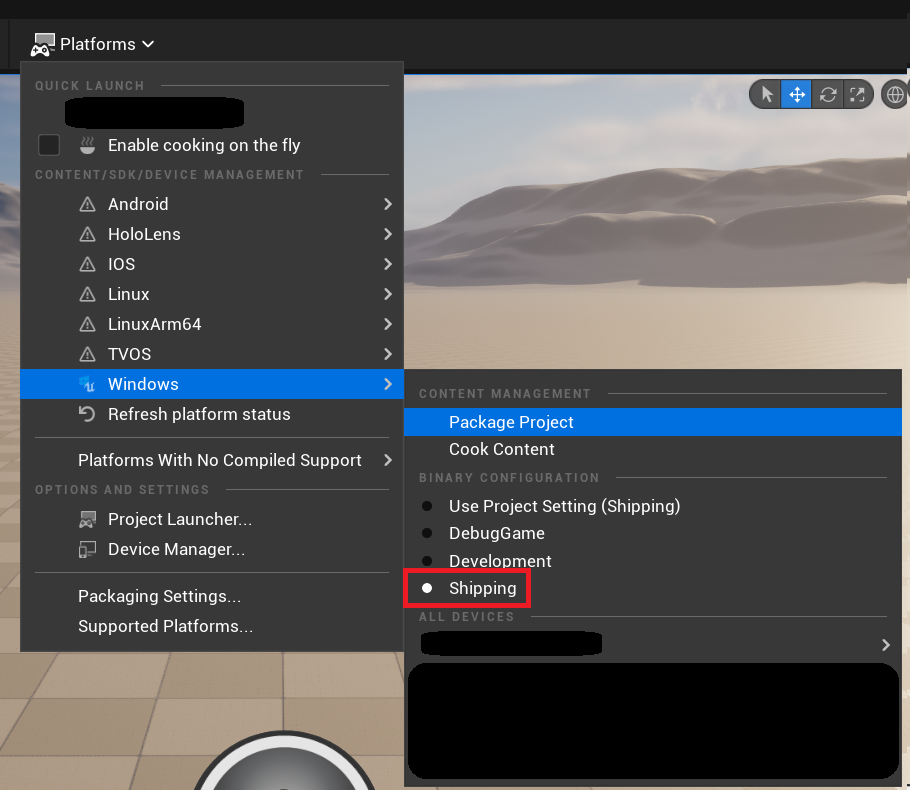
- Set the project to use IO Store with Chunks.
- Navigate to Edit > Project Settings > Packaging Tab.
- Enable “Pak File” “IO Store” and “Generate Chunks”, then close the window.
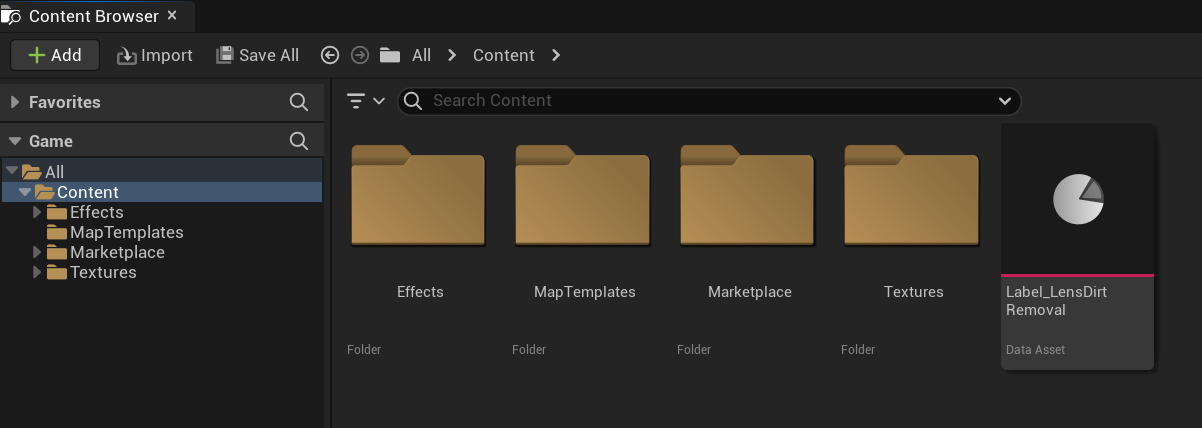
- Create a Chunk ID Label in the main Content folder.
- From the Content Browser open the Content folder (All > Content). Note that inside of this folder should be all of your sub-folders with your modified assets.
- Right-Click in the Content Browser next to your folders > Miscellaneous > Data Asset.
- Name this new Data Asset “Label_<mod name>” (EX: Label_ReplaceCrosshair). Check out the above image of the Content Browser to see how this should be laid out.
- Open the newly created Data Asset, and set Priority to 1 (or higher), Chunk ID to a high number (1000 or higher recommended), Cook Rule to Always Cook, and enable Label Assets in My Directory.
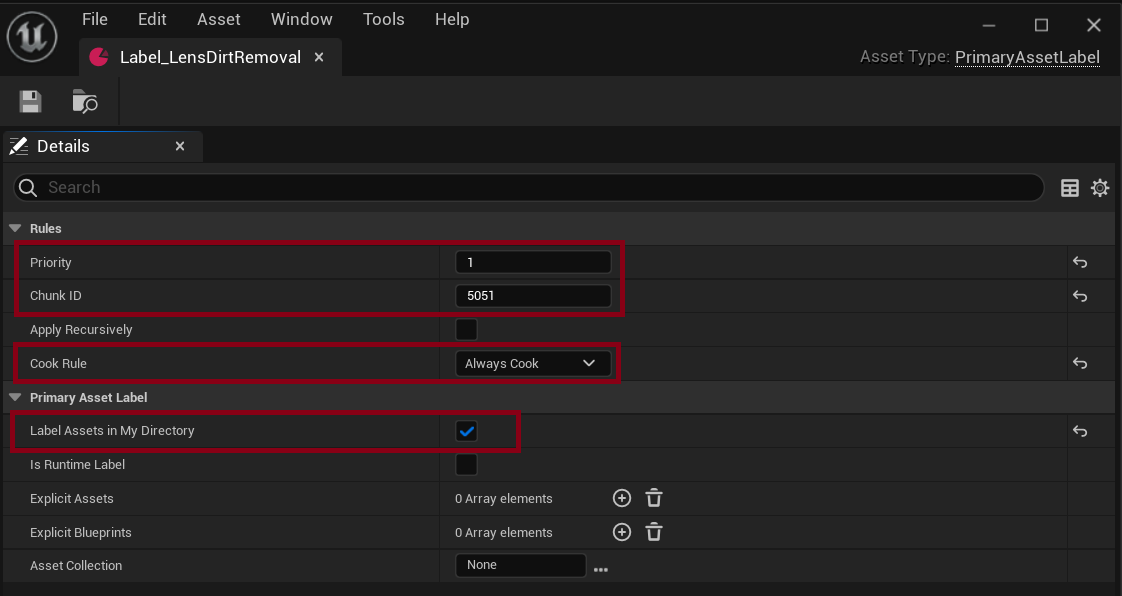
- You can learn more about Chunks here: https://docs.unrealengine.com/4.26/en-US/SharingAndReleasing/Patching/GeneralPatching/ChunkingExample/
- Package the files for Windows. Ensure Binary Configuration is set to Shipping (this may not matter, but do it just to be safe!)
- When asked for the folder, you can save this anywhere, just be sure to remember where it is.
- When asked for the folder, you can save this anywhere, just be sure to remember where it is.
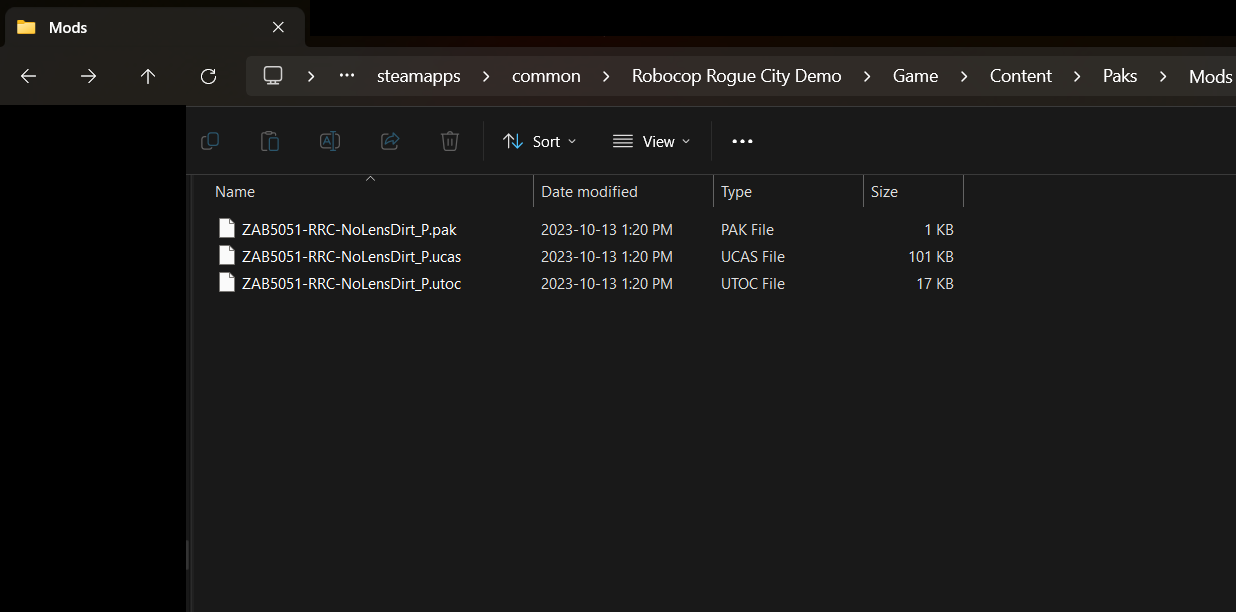
- Navigate to the Packaged build in Windows, and drill-down into the Paks folder.
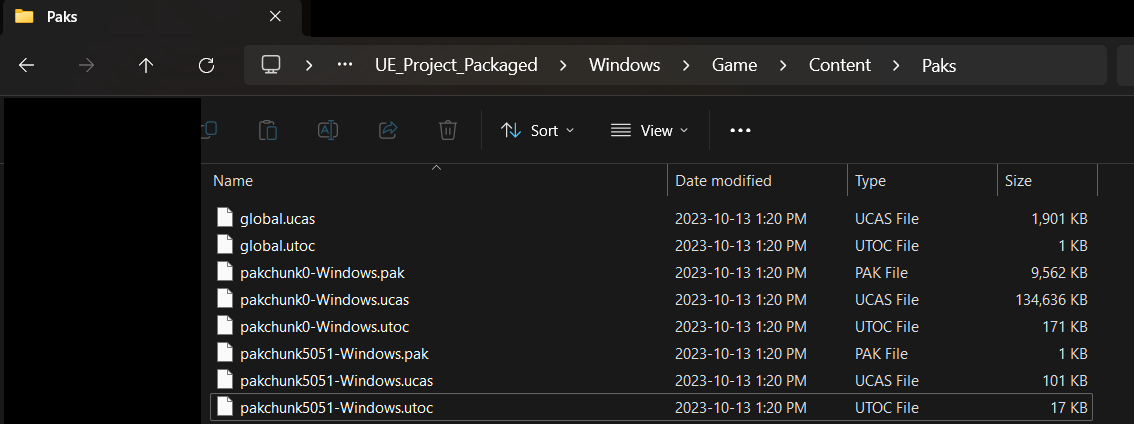
- Copy the files with your Chunk ID from Step 4 to the Mod directory inside Paks folder (For RRC is looks like ~steamapps\common\Robocop Rogue City Demo\Game\Content\Paks\Mods).
- If a Mods folder does not already exist, create one.
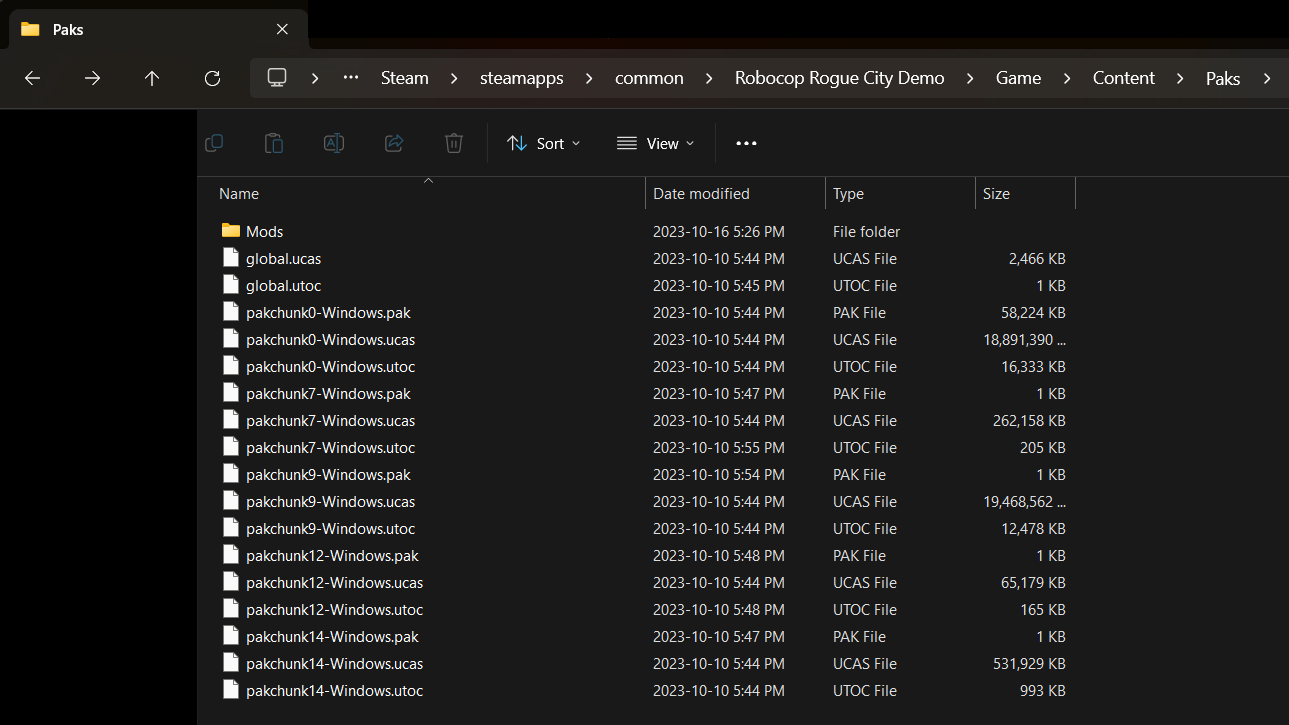
- Note: ONLY COPY THE MATCHING CHUNK ID FILES. The other files may overwrite basegame functionality and break everything!
- Rename each File to be specific to your mod, ending with “_P”. I also recommend keeping the ChunkID somewhere in the name so it’s easier to remember.
- Note: DO NOT FORGET THE “_P”, AND BE SURE THEY ALL HAVE THE SAME FILENAME.
- That’s it! Launch the game, and your Content mods should be applied!
Optional Steps
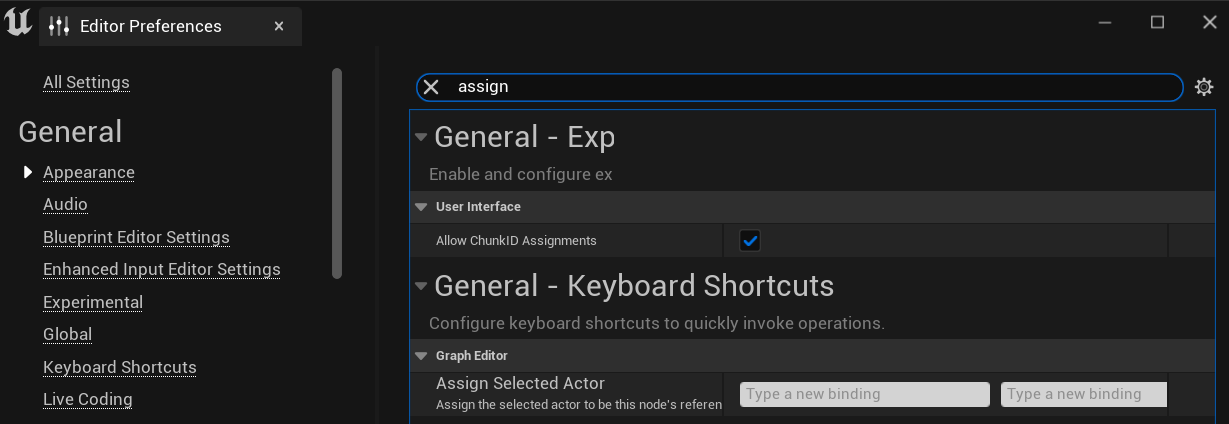
- Enable per-asset Chunk ID assignment. Not necessary, but can prove useful for more complex mods.
- Navigate to Edit > Editor Preferences > Appearance Tab.
- Search for “assign”, Enable “Allow ChunkID Assignments”, then close the window.
Do you know how to modding the Lords of the Fallen 2?
This allows me to extract the .uasset files for the game’s audio, but how can I actually play and edit the audio? I can even open those files in FModel’s audio player, but it says “No audio file.” No problems with textures or anything, but FModel has this limitation when it comes to the sound files. Any solutions?
Ahh, figured it out. This gives a loose but good explanation of how to access the data files through FModel:
https://github.com/4sval/FModel/discussions/422
Good deal!